
Recording a passable acoustic guitar sound is fairly easy, but how do you get a great sound? We tried and tested tips and techniques from the world's most celebrated producers and sound engineers to show you how.
Acoustic guitar is so much a staple of modern music styles that it seems every other demo we receive at SOS Towers features at least one. It's hardly surprising, then, that several generations of the world's greatest recording engineers have poured their efforts into the quest for the perfect sound. This is great for the record‑buying public, but can be extremely frustrating if you're a home-studio musician struggling to compete with commercial productions.
In this article, I'm going to try to level the playing field a little, by looking in detail at a range of production techniques for acoustic guitar, many of them drawn directly from my research into the real‑world techniques of the world's most celebrated engineers and producers. I know we don't all have access to the top‑flight studios and recording equipment that they do, though, so I'm also going to suggest how you can adapt their techniques when you're strapped for cash and working in less ideal environments.
Every engineer has their own idea of what a great sound is, so there's no point trying to tell you which is the 'best' technique: it's far more important to know how different factors in the recording and mixing process can affect the final timbre, so that you can find what you personally are looking for.
To this end, I took a bunch of mics down to London's prestigious Livingston Studios and recorded an acoustic guitarist with several different mic models and techniques — so that you can evaluate by ear which ones give the results you need in your own productions. I've used the same recordings to demonstrate some common mixing and salvage techniques as well. For details of where you can listen to or download these files, check out the 'Essential Audio Examples' box elsewhere in this article.
Your Friend, The Guitarist
 Pierre Marchand."I once asked Daniel Lanois for advice on how to get a good acoustic guitar sound,” recalled Pierre Marchand back in SOS March 2000. "His answer was 'first get a good‑sounding acoustic guitar'.” Whatever you record in the studio, the minutes you spend choosing, adjusting, and properly tuning the instrument you're going to use will probably make the most difference to the quality of the recording. In recognition of this, producers often keep their own collection of different well‑maintained guitars (even if they don't actually play the instrument themselves!), and get to know which ones suit different roles. "In country, the choice of the instrument is just as critical as the microphone,” says Bob Bullock, for example. "A big Gibson J200 gives you a very full, rich sound, which is great for padding the track. Taylor guitars offer a sharper, edgier sound, which is good for licks and solos.” Mike Clink adds that "the pick determines quite a bit of the sound when someone's playing, so I'll experiment with a soft, medium and heavy pick, and make that choice. You can even tape two picks together around a dime or a nickel so you actually get two plucks on a string.”
There are lots of other ways that guitarists can adjust their sound, but if you (like me) can scarcely tell one end of an acoustic guitar from the other, it's tricky to get a perspective on how much can be achieved in this way. My main bit of advice here is to give the player the time and space to work with you on refining the source sound, before you get too involved in pointing a mic anywhere. "Recording acoustic instruments is a team sport,” confirms Joe Zook. "Nine times out of 10 a great acoustic sound happens when the player makes subtle adjustments, such as moving a couple of inches or changing picks. It's all in the hands of the player.”
Understanding Guitar Sound Dispersion
One of the principal challenges when recording a given acoustic guitar is to capture a good balance of the different noises it produces. While there's a lot that you can do to modify the sound of the instrument itself, there's also much that can be achieved via careful mic positioning, so it pays to be aware of a few general principles governing the instrument's unique dispersion characteristics.
To state the obvious for a moment, it should be clear that the guitar's body resonates but, crucially, it does this in two main ways: not only do the wooden panels themselves vibrate, but also the body of air that's contained within them. While the panel resonances affect the character of the instrument's sound in extremely complex ways, the impact of the air resonance is a bit simpler, primarily just improving projection and sustain in the guitar's low registers.
The air resonance is usually tuned during the guitar's manufacture to be somewhere around 100Hz, and its effects will be exaggerated if you stick a close mic on‑axis with the sound hole, producing an unattractive 'booming' quality, with uncontrolled low‑frequency level peaks on certain notes, depending on how their fundamental frequencies interact with the resonance. As you move a close mic horizontally away from the soundhole, and head up the fretboard, you'll get a fairly progressive reduction in low‑end power, as the air resonance and then the panel resonances colour the signal less, and the brighter, more direct sound of the strings themselves emerges more strongly.
The air resonance is usually tuned during the guitar's manufacture to be somewhere around 100Hz, and its effects will be exaggerated if you stick a close mic on‑axis with the sound hole, producing an unattractive 'booming' quality, with uncontrolled low‑frequency level peaks on certain notes...
Another basic principle which can help you home in on the right sound is that the body and air resonances will tend to carry further than either the sound produced directly by the strings themselves or the mechanical noises created by picking or fretting. If pick/fret noise is too prominent, pulling your mic further away from the guitar can help reduce it, albeit at the expense of some of the 'zing' that the strings can impart at close range. These same sounds also tend to be richer in high frequencies, and as such will be more easily shadowed by physical obstructions than the lower‑frequency panel or air resonances, so it stands to reason that any mic position that cannot 'see' the strings themselves will come across warmer and more subdued.
Sticking with the blindingly obvious for a moment longer, it should be apparent that the acoustic guitar isn't a 'point source'. In other words, it has significant physical dimensions, especially if you're close‑miking. Because different parts of any instrument will radiate different frequencies in different directions, it becomes very easy to achieve an unbalanced recorded sound if you close‑mic any particular single point on the instrument. However, if you move your microphone back a little way, to try to catch the instrument's tone more naturally, you may capture too much of your recording space's own reverberation — and may also sacrifice some of the appealing (though arguably unnatural) immediacy imparted by the sound of the strings.
In Search Of The Perfect Microphone Position
With those basic considerations in mind, let's compare some potential mic positions. Assuming for the moment that you have only one mic, there's one position that seems to be much more commonly recommended by working engineers (and, indeed, in print) than any other. It's what I've taken to referring to as the 'vanilla' position. This points the mic roughly at the junction between the instrument's neck and body, where you can usually achieve a fairly good balance of the body and panel resonances while simultaneously catching a good dose of added liveliness from the strings themselves — which is ideal for the typical role of an acoustic guitar that will be worked into a busy mix. Some tweaking of the exact position and mic angle is sensible, but you can get results pretty rapidly.
 Mike's 'vanilla position' is to place the mic pointing somewhere around the area where the neck joins the body. The precise angle of the mic and distance from the guitar will vary according to the guitar, the track and the desired sound.However, there are those who feel that this mic position takes the string emphasis a little too far — at the expense of some of the instrument's characteristic body resonance — so there's an argument that the acoustic guitar should be recorded more from the front, given that this is the way it's actually designed to project its sound. This has led to a second common setup, favoured by engineers such as Steve Albini, Al Schmitt and Jim Scott, which puts the mic out at the front of the guitar's body, horizontally in line with the soundhole, but steering clear of over‑prominent air‑resonance 'boom' by moving off‑axis to the sound‑hole vertically. "I don't necessarily point the microphone straight at the sound hole,” explains Albini. "Sometimes you want to get it up in the air a little bit, looking down at the guitar so you can get more of the strumming and less projection of the hole. If the guitar is a little thin‑sounding, you want to have it more in front of the body.”
Although it's useful to understand the reasoning behind these common positions, it must be acknowledged that the resonant qualities of different instruments can vary widely — and acoustic guitars, in particular, can really benefit from a more empirical approach when miking in the studio. Mike Clink puts in the legwork before he even sets up a mic: "Because every guitar sounds different, and everybody plays the guitar differently, I move my head around to see where the best sound source is. Before I even place a mic on an acoustic guitar, I've got my ear moving around a radius trying to find out where the right sound is coming from.” Pierre Marchand prefers to work according to what the microphone is capturing, rather than relying directly on his ear, so he suggests that you spend "three minutes with the headphones turned up loud, moving the mic around the instrument until it sounds right, and leave it there.”
 Placing the mic somewhere in an arc around the bridge, and pointing roughly towards it offers an alternative single‑mic position that places less emphasis on the bright string sound than the 'vanilla position'.It's all well and good just saying "go on then, experiment!”, but it can be useful to have a few ideas of where you might want to try listening, other than the two positions discussed above. Some engineers suggest moving a close mic horizontally away from the soundhole on the bridge side, which offers a lot of variety in terms of the resonant colourings of the guitar's front panel — although you do have to work around the high‑frequency shadowing of the player's right arm, as well as being wary of excessive pick noise. Mic positions up by the player's ears are occasionally suggested, which I imagine are, as much as anything, in response to the archetypal player's refrain "but that's not how I'm hearing it.” Again, you need to be careful of high‑frequency shadowing effects, so I'd try to keep the mic a little forward of the player's head if possible — and hope you're not dealing with a heavy breather!
Another set of fairly rewarding locations can be found along an arc to the right of the player, centred on the instrument's bridge, particularly where fret noise is more of a concern (for example, if the guitarist is softly finger-picking), as the mic is then placed further away from the source of the unwanted sound. Again, positions above and below the guitar tend to produce the most promising sounds, by avoiding the player's acoustic shadow, and it makes sense to have the mic slightly forward of the plane of the instrument for similar reasons.
Mic Distance, Polar Patterns & The Role Of The Room
I mentioned that there is a compromise to be struck between picking up suitable sonic contributions from the different physical areas of the acoustic guitar, and at the same time keeping a well‑defined sound free from unwanted room ambience. In pursuit of the ideal balance, the most basic variable is miking distance — but if you sift through the evidence you'll find a lot of disagreement amongst different engineers in this regard, with recommendations spanning positions from just a few inches away, as suggested by Bob Bullock and Frank Fillipetti, to distances of two to three feet, typically preferred by people like Steve Albini and Jim Scott.
Why the disparity? Well, the choice of mic and polar pattern is bound to play a role. Directional mics can unnaturally spotlight specific regions of the guitar when used close up, and the low‑end contribution from proximity effect can also become overbearing. "Acoustic guitar sounds terrible with a cardioid mic too close to it,” remarks Keith Olsen, for example, who recommends trying an omnidirectional polar pattern instead, and there are some good reasons to heed his opinion. Not only does an omni's lack of proximity effect provide a bit more positioning freedom, but its wider pick‑up pattern is well suited to providing a fuller picture of the guitar — even at smaller miking distances, where the intimacy of the string‑borne high frequencies is most concentrated.
Although an omni will inevitably pick up more of the sound of the room than a cardioid in the same position, the fact that the omni can frequently be placed closer to the instrument means that this difference between the two patterns is likely to be less dramatic than you might expect in practice. Plus, you can easily improve things further by placing a little acoustic absorption behind the mic: just a bit of extra upholstery or a panel of acoustic foam will make a difference — but there are also more efficient bespoke alternatives, such as the SE Electronics Reflexion Filter or T‑Bone Mic Screen, if you want only the driest audio.
Live Or Dead Acoustic Environment?
The extent to which the room sound is allowed to impinge on the recording is another moot point, with two main lines of reasoning, the first of which goes like this: if you record in a highly damped acoustic environment, you can pull a microphone further back from the instrument to achieve a more holistically representative sound, without any concern about the level or type of room ambience — and whatever blend or spaciousness you need at mixdown can be supplied via reverb and other effects. This tactic makes some sense if you're thinking of using directional mics: these tend to sound better at greater distances and can also reduce spill between vocal and guitar mics if you're dealing with a singing guitarist. However, this technique is actually less commonly employed than you might think.
The reason for this, as I see it, is that dead‑room recording makes it more time‑consuming to get a full and balanced sound, especially when you're faced with a merely mediocre‑sounding guitar, or if your guitarist is moving around while playing. At the heart of this problem is that in a dead room the mic will be picking up primarily only one perspective of what is a very complex instrument. In more reflective environments, you get different aspects of the guitar's timbre heading out of the guitar in different directions, and then bouncing back towards the mic from nearby surfaces to give a more complete representation of the overall tone. What's more, this combined sound seems to me to remain a bit more consistent as you move your mic around, making the exact mic position a little less critical. Whatever the reasons, the bottom line is that the majority of top producers seem to prefer to use some reflected sound to bolster their acoustic guitar recordings.
While this might work fine in stellar recording rooms, though, less euphonic spaces can easily yield an unnaturally coloured timbre, and levels of unsuitable background ambience that make the guitar well‑nigh impossible to fit into your mix. This puts some home recordists off trying to use reflections to advantage, which is a shame, as it's usually easier to get a good budget sound in this way than by trying to deaden a domestic room on the cheap. You just need to take a little bit of care in choosing the room that you use.
Recording On A Budget
The first thing to say about rooms is that you should generally avoid small rooms, particularly improvised miniature vocal booths, or the kinds of eight‑feet‑wide cubic box rooms to which many home studios are relegated. The problem is that smaller rooms tend to have resonance problems at frequencies that coincide with the low‑mid range of the guitar sound, resulting in big changes in the frequency response picked up at the mic, even for quite small changes in the position of the instrument or mic. It's not that you can't work around room-resonance problems to some extent with trial and error (and the patience of a saint) — but life is much easier if you don't have to.
Equally, though, you rarely want a room that's so large or reflective that you can hear a suggestion of vaulted catacombs, even when the mic's effectively stapled to the fretboard! Although a few early room reflections can be your friend, any further reverb can restrict your options when creating a final mixdown. Sure, if you can find a great‑sounding recording room, by all means take full advantage of its ambience — but if you're at all unsure, you'd be unwise to paint yourself into a corner at the mix by capturing too much ambience or ambience of the wrong sort.
As long as you're not fighting room modes or excessive reverb decay, you should be able to get good‑sounding results by placing the performer and mic to make use of the reflections from a hard surface or two. You can get a more subjectively satisfying picture of the instrument like this without your having to move the mic as far away, so you can reduce pick-up of the room's overall ambience too, thereby keeping your mix options more open. Furthermore, a closer mic position allows you to emphasise the sound of the instrument's strings if you want a more up-front sound. You can use the room's walls as reflectors, or pull back carpets to give you some bare floor beneath the performer, but a more flexible solution is to press a couple of bits of hardboard into service, propping them up in different locations to find the best sound. In school and college studios, whiteboards can make really good movable reflectors, and there always seem to be some spares gathering dust somewhere if you poke around a bit.
Multi‑mic Techniques: More Of Everything
Whatever the acoustics of the recording venue, another obvious way to catch a more realistic sound despite close‑mic positioning is to put up two mics, with each catching a different aspect of the guitar's tone. This approach also increases your options at mixdown, at which stage you can adjust the balance of these signals for optimal results in the context of your full arrangement.
With this idea in mind, some recordists try putting one mic over the soundhole and one over the fretboard — but that will almost always just bury the sound in air‑resonance boom, pick noise, string buzz, and fret squeaks, as should already be clear. You're more likely to get better results in practice if you start by finding as good a sound as possible with one of the two main single‑mic positions I've already mentioned (bearing in mind the amount of string presence and room ambience you prefer), before supplementing that with another mic. The idea behind this is that you have a lot more leeway in placing the second mic if you've already got a pretty good single‑mic sound.
So, for example, if you decide to start with the 'vanilla' position and need more low‑end warmth to balance the close string tone, you may be able to use second‑mic positions that can't see the strings or which are in the performer's acoustic shadow, without worrying too much about the reduced high‑end pick-up. On the other hand, a more frontal first‑mic position angled off the soundhole might need only some string definition, something that a high‑pass‑filtered second mic will deliver from a variety of positions off the guitar's fretboard. You can then choose a spot that keeps unwanted mechanical noises to a minimum.
Beware Of Phase Relationships & Comb‑filtering
Whether dual‑mic techniques like this give you a sound that's more or less than the sum of its parts depends also on the phase relationship between the two microphone signals. If you're not familiar with the idea of phase, check out my article back in SOS April 2008 for a more detailed explanation, but here's an abridged version for now. Two microphones set up on the same instrument will pick up the sound at different times, according to the different distances the sound has to travel to reach each one. Because of these 'phase differences', the mic signals won't necessarily add together in the way you might expect them to, due to a frequency‑cancellation effect (called comb filtering) that arises out of their interaction.
 The X-Y crossed-pair mic technique minimises phase cancellation and offers plenty of tonal flexibility on acoustic guitar. If you find that your two mics sound better in isolation than when mixed together, you've probably got a problem with comb filtering. In this case, there are a couple of quick fixes on hand. The first is just to try inverting the polarity (often referred to as 'flipping the phase') of one of the mic signals, particularly if the two mics are positioned on opposite sides of the instrument. It's a fairly broad‑brush change, though, and it's usually better to just shift the miking distance of one of the mics a little to improve the combined sound: small mic‑position changes can make quite a difference to the nature of any comb filtering without dramatically changing the guitar tone picked up by the individual mic. If you listen to the combined guitar sound while you're doing this, it makes it quicker to find the nicest timbre. It may still take a little time to find the best combined sound, so once you're happy, do make sure you really clamp down the mic stands to avoid them wandering during the session. (It's also worth investing in some decent mic stands that don't have a tendency to sag!).
By the same token, it makes sense to try to keep the player in as consistent a position as possible both during and between takes. Otherwise, you may find your sound phasing slightly as the distances between the mics and the performer vary. A bit of gaffer tape on the floor can help, by marking the positions of the player's chair and/or feet, but if the player moves around a lot during their performance, there's only so much you can do here. This is another reason why using a second mic in a more subsidiary role makes sense, because any comb filtering will be at its worst if you have both mics at the same level.
Being able to capture a fuller sound from close‑mic positions is really useful, but personally I'm always cagey about the phase implications of this kind of dual‑miking. My personal preference is to use a crossed coincident pair of directional mics instead, roughly in the 'vanilla' position. This is a technique many people associate with the capital of country music, Nashville, so here's a description of it from the lips of one of that city's top engineers, Chuck Ainlay: "I like to record acoustic guitar with the XY pattern — one capsule pointing towards the fretboard and the other one more towards the hole — placed somewhere off the 12th fret, about where the neck combines with the body of the guitar.” Another Nashville veteran, Bob Bullock, describes a similar technique, adding that "it lets me get the sound of the low and high strings with more definition, which means I use less EQ, and it gives me a good combination of room and guitar resonance.”
The exact miking distance and mutual angle will, of course, make a difference to how each mic sounds, but if you keep them within a foot or so (Bullock suggests 4‑6 inches) you'll find that they will, roughly speaking, provide separate control over the LF and HF elements of the sound. Balancing the two signals then becomes almost like adjusting an EQ — and I find that this makes it much quicker to get an appropriate tone than when using a single mic. In addition, the horizontally elongated combined polar pattern of the X-Y mic pair is better suited to picking up sound from the width of the guitar than that of a single directional mic.
Mixing A Good Acoustic Guitar Recording
I always bang on a bit about recording techniques for acoustic guitars, and one of the main reasons for this is that I find well‑recorded acoustics usually take very little mixing work. If you have a busy mix, you may want to reduce a little of the low end and brighten the sparkly 15kHz region to keep them shimmering through, but that doesn't take much effort. Similarly, a bit more sustain can be added by a few decibels of gentle low‑ratio insert compression, or alternatively by some parallel compression if the insert processing sounds too constricting. If you're using global send‑return reverbs, then these can be used conservatively to sit the guitar into the mix, especially any darker‑sounding ones, since these are less likely to unduly emphasise pick and fret noises.
 If you've multi‑miked the guitar, then it's certainly worth checking that the balance and phase relationship between the mics is still well suited to the final arrangement. Without the pressure of a performer twiddling their thumbs waiting to be recorded, you can usually afford to experiment a little more and refine this aspect of the sound, either by subtly sliding the relative timing of the recorded tracks against one other, or by using a specialised phase‑rotation plug‑in such as the Little Labs IBP or Voxengo's PHA979 (there are also freeware ones such as Betabugs' Phasebug and Tritone Digital's Phasetone available if you don't have something like this already).
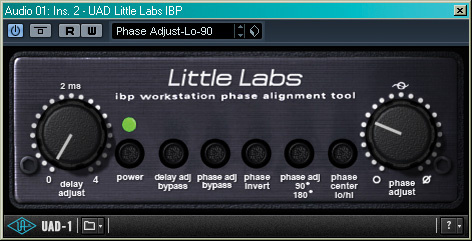
, Voxengo's PHA979 or Betabugs' freeware Phasebug.") If you encounter phase problems during the mix, you could try using a phase-alignment tool such as Little Labs' IBP (shown here for the UAD platform), Voxengo's PHA979 or Betabugs' freeware Phasebug.The issue of placing acoustic guitars in the stereo field can warrant some closer scrutiny too, because there are quite a few options to consider. For rhythm parts, it's very common practice to generate stereo width through opposition‑panned double‑tracking, and that's something many recording musicians forget about when recording — only to wonder later on why their guitar parts sound narrow and lacklustre. (The practice of layering alternative tunings is also often neglected — and if this concept is new to you, check out SOS March 2009's Guitar Technology column for some guidance.) The most important thing to remember when double‑tracking is to pay attention to the timing, even if that means editing to move bits of audio around. Otherwise, the rhythm of your track will suffer, and you'll also get annoying stereo flamming going on between the parts. Also, be aware that any hard‑panned tracks can sink quite dramatically into the mix when they're heard in mono, so do check your mono compatibility.
If you encounter phase problems during the mix, you could try using a phase-alignment tool such as Little Labs' IBP (shown here for the UAD platform), Voxengo's PHA979 or Betabugs' freeware Phasebug.The issue of placing acoustic guitars in the stereo field can warrant some closer scrutiny too, because there are quite a few options to consider. For rhythm parts, it's very common practice to generate stereo width through opposition‑panned double‑tracking, and that's something many recording musicians forget about when recording — only to wonder later on why their guitar parts sound narrow and lacklustre. (The practice of layering alternative tunings is also often neglected — and if this concept is new to you, check out SOS March 2009's Guitar Technology column for some guidance.) The most important thing to remember when double‑tracking is to pay attention to the timing, even if that means editing to move bits of audio around. Otherwise, the rhythm of your track will suffer, and you'll also get annoying stereo flamming going on between the parts. Also, be aware that any hard‑panned tracks can sink quite dramatically into the mix when they're heard in mono, so do check your mono compatibility.
 Mike tested a range of microphones and mic techniques described by over 20 of the world's top producers: to hear the results for yourself, visit the SOS web site, download the annotated audio files and audition them in your DAW.Recording with two mics gives you the option to spread the guitar across the stereo picture, by panning them left and right. Although you'd think that this might produce a rather unnatural effect, it can actually make the guitar sound much more real and three‑dimensional. Bob Bullock, for example, pans his two acoustic‑guitar mics "the same way I would a piano, with the lower frequencies on the left and the higher ones on the right, which creates a fuller, but still very natural sound.” The key decision is how far to push the panning, because the '50‑foot guitar' produced by hard left/right settings is rarely what you're looking for. "I wouldn't try to get a real broad stereo image on [acoustic guitar],”
 Al Schmitt.Producer Al Schmitt concurs: "It would just be a little off — a little left and a little right of centre – just to give it a little bit of stereo.”
A similar sense of subtle stereo‑width enhancement can be added to mono recordings using modulation effects, something that Jason Goldstein and Renaud Letang have both talked about in print. Short ambience reverbs are another option, of course, although high levels of short reverb have the potential to comb‑filter against the dry signal, changing its tone. Whether this tonal change turns out to be an advantage or a disadvantage, however, is for you to decide. Some pro mix engineers, such as Jon Gass and Manny Marroquin, use reverbs deliberately for this kind of creative tonal modification.